I was lucky enough to have had a family farm. Due to financial reasons, my father recently
decided to sell the farm. This is a
whole different story, and not mine.
In the old kitchen, there was a dilapidated old cupboard. In my mind this old cupboard holds many good
memories. Of my dad making sweet tea
for everybody early in the morning. Of
taking out the odd assortment of cutlery to set the table for the meals that
had been cooked outside. Of hidden
treasures of rusks and biltong found when a snackwish hits….
This is the only item I asked for when my brother and my husband
started to remove the furniture from the house. There was a huge kitchen table,
an assortment of chairs. A lovely art
deco sideboard…. But being the youngest
of five, of course the older ones get first choice.
I got the cupboard, which I’m very glad about.
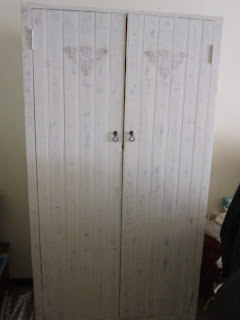
The cupboard reached me in this state:
Ugh, you say, what’s she want that ugly old cupboard for? Yes, it’s not a good-looking cupboard. Not even a very well-made one (it looks like
someone built it from old floor-boards).
But I like it.
So I started transforming the old cupboard.
I first removed the bright green paint, using alternately
paint-stripper and a heat gun.
Frankly,
the heat gun works much better. I
eventually got the hang of it and discovered that if you work from the bottom
to the top, holding the scraper/putty knife underneath the heat gun and working
in a semi-slow movement and giving the heat gun chance to do its business, you
can scrape large pieces of paint cleanly off the wood in one go. The cupboard had had a layer of black paint
under the green and some of the floor boards had either been oiled or a type of
varnish as well, so it wasn’t all that easy.
Be warned that both paint-stripper and heat gun are dangerous. I got a minute drop of paint stripper on my
skin, and it blistered like a regular burn – it also hurts like a regular
burn! As to the heat gun – if it’s hot
enough to melt paint, I can only imagine what it will do to your skin! Also, the sheets of paint falling down are
also hot, so wear shoes!
After I had removed as much paint as I could, I used copious amounts
of wood-filler in some places, as the wood is really badly damaged.
Then I sanded the thing down. I used my husband’s belt-sander. If I’d tried to do it by hand, I would
probably have chopped the thing up in the end, no matter how much I loved
it.
Use the sander with the grain of
the wood, work outside and if possible, wear a dust mask, ear protectors and
safety goggles. Which I didn’t and am
pretty sorry for. Again, be careful
with this tool, as it will remove skin in a tick!
This was the easy part.
Next I washed the whole thing down with sugar-soap, and since I was
working outside, this was fine, as it dried pretty quickly.
Do use gloves, as sugar soap is quite rough
on one’s hands.
I scraped a little plain candle wax on selected areas.
As the wood
is so badly damaged in places, I was quite careful as to exactly where I
scraped it.
Next came painting a primer all over. I painted the top and the insides as well.
I chose a rather muted creamy colour, which I wish I hadn’t done – I
should have used an even creamier tone.
But nevermind. I used a sponge
roller for the top coat of paint, as it gives a nice finish.
After I had painted in the grooves (which was quite irritating, as I
ended up having to use one of my watercolour brushes) and given the back a
second coat, I lightly sanded the thing again.
Now what happens is that when you sand it, the raised bits where the
candle wax had stopped the paint from fixing, the paint comes off. This would be the same as if the cupboard
had been worn down over years of use – a sort of “natural” ageing.
I chose this picture

from Graphics Fairy.
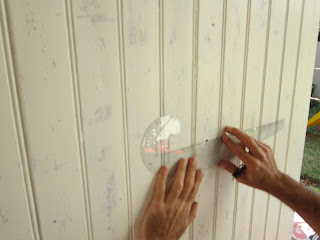
A normal printed image, and an inverted one.
After carefully measuring where to place the pictures,
I used some
good old masking tape to hold them in place.
Then paint thinners
dabbed on with an old baby-towel
transferred the ink
from the prints onto the paint.
I
didn’t want it transferred too clearly – but perhaps I did it a tad too
faintly?
Maybe not everybody’s cup of tea, but I LOVE it!
I picked up two rolls of vinyl wall paper at my local Builder’s
Warehouse “end of range” table.
They
didn’t have any two rolls of the same (except really ugly ones), so I took
these two. Even if they don’t really
look the same, they had the same “feel” for me.
Carefully measuring the inside of each shelf,
I cut the pieces to
fit.
Remember to measure twice and cut
once!
Wall-paper paste,
following the manufacturer’s instructions
and
applied generously, followed by messy installation
I had wall-paper paste up
to my elbows, and even in my hair.
In the corners I used an old NT cutter (hobby knife/box cutter,
whatever you want to call it) to cut slits in the wall-covering so that it fits
neatly.
Here’s a tip: When cutting this, it seems the blade goes
blunt very quickly, and when the blade is blunt, it tears the paper rather than
cutting neatly.
Two layers of varnish was applied, using a sponge brush.
My husband insisted on helping me attach the new handles.
I got these quite cheaply at Builder’s, I
must admit these were the first I saw and I grabbed them. I probably should have looked a little
harder. But I like these and they sort
of fit with the “feel” – if you know what I mean.
As the screw is a bit longer than what the door is thick, hubby
found a couple of little nuts that fit quite nicely.
We carefully measured the placing of the handles
and hubs drilled a
hole in each door
and screwed in the bolts,
making sure that the handles were
hanging down straight.
Well, I must admit I’m pretty proud of my cupboard make-over.
Now, you say, very well, but what are you going to DO with it.
Well, see, as I’ve said before, my work-space is our dining-room
table, and as such, there’s not much room to keep my fabric stash.
Ahem….yes. That’s what it looks (looked) like. The big black one on top? Batting.
So, don’t you think the cupboard looks SO much nicer than that stack
of crates? And also, I can actually SEE
what I have.
No, you’re right, I haven’t unpacked all of the fabric yet….but I’m
gonna do it now…..
PS This was NOT a week-end project. More like four week-ends


Ah this is stunning! Well done!
ReplyDeleteAw, thanks Tarien!
DeleteWow! Really lovely!
ReplyDeleteThanks Inge!
Delete